
[sc:wpcloud]W3 Total Cache is an outstanding WordPress plugin. It’s free and provides a tremendous performance optimization for your site. You can learn more about W3 Total Cache at its plugin site.
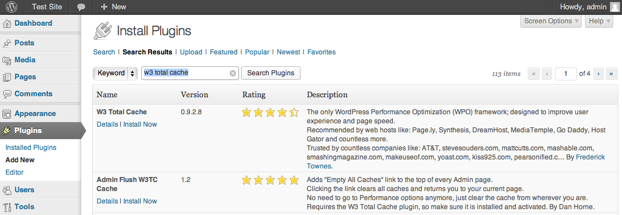
Log in to your WordPress administration page at http://yourdomain.com/wp-admin using the username and password you configured during setup. Select Plugins -> Add New from the left sidebar menu. Or, visit http://yourdomain.com/wp-admin/plugin-install.php. Search for W3 Total Cache.
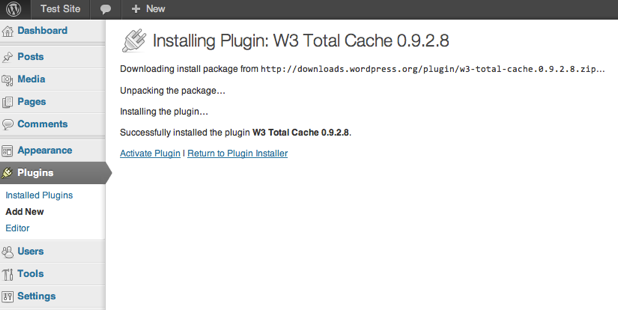
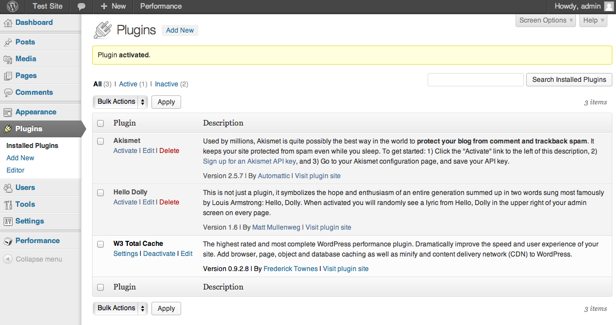
Here’s what the process will look like:


Configure W3 Total Cache Settings
Because of its power and sophistication, W3 Total Cache has a wide variety of settings which can seem overwhelming. Below, I provide some recommended settings that make getting started easier. I’ve also provided instructions for downloading my settings and importing them if you’d like to start that way. I’ve documented the Amazon CloudFront CDN configuration separately as it requires a series of distinct steps.
Don’t get overwhelmed. Start with the General Settings shown below and go from there.
Alternatively, W3 Total Cache offers paid installation and support from $75 – $200 and up. You can reach them through its plugin Dashboard page or their website. This is a great plugin so I feel good about recommending them although I do not have experience with their support. You may also want to review the W3 Total Cache installation overview and FAQ on the plugin website for more details.
At a high level, I recommend activating the following settings which I detail more fully below:
- Page Caching – Caches pages for faster loading and more efficient delivery (separate from Varnish)
- Minify – Shrinks and combines JS and CSS files for faster loading and more efficient delivery.
- Object Cache – Speeds up generation of content by WordPress.
- Browser Cache – Properly tags content so that browser clients minimize downloads of pages.
- Reverse Proxy – Instructs W3TC to purge the Varnish cache when posts, pages, et al. are updated.
- Amazon CloudFront CDN – Ensures the delivery of static files and images quickly, reliably and geographically near to your visitors.
- Miscellaneous – Use Sitemap for caching to pre-cache high priority pages.
Installing Supporting Components
Before we configure W3 Total Cache, let’s install and activate a number of Apache components that it will require. Again, connect to your instance and perform the following steps:
sudo apt-get install php5-memcache memcached php-pear build-essential php5-tidy php5-curl apache2-dev
sudo pecl install memcache
sudo pecl install apc
Edit your php.ini file to activate memcache:
sudo nano /etc/php5/apache2/php.ini
In the Dynamic Extensions section, add the lines below:
extension=apc.so
extension=memcache.so
Tell Apache to activate these modules:
sudo a2enmod rewrite
sudo a2enmod expires
sudo a2enmod headers
sudo service apache2 restart
Edit your wp-config.php file to enable caching:
sudo nano /var/www/wordpress/wp-config.php
Add the following WP_CACHE definition above the stop editing line:
define('WP_CACHE', true);
/* That's all, stop editing! Happy blogging. */
Reviewing Configuration Status
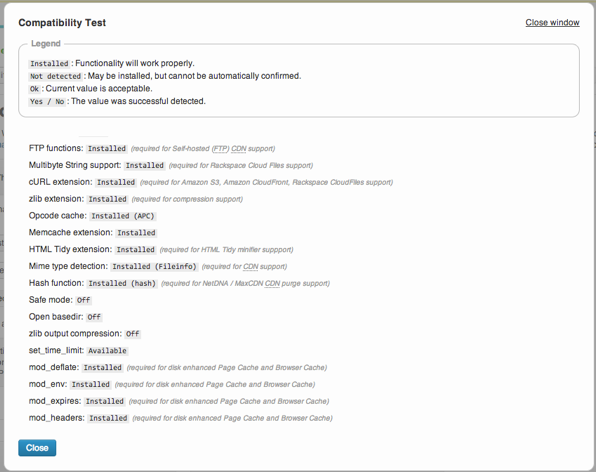
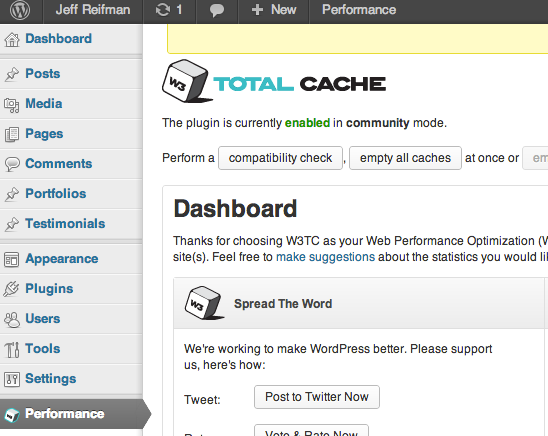
At this point, it’s useful to visit the W3TC plugin Dashboard and check that all the proper components are active. From the left sidebar, click Performance -> Dashboard, then click the Compatibility Check button. It should look something like this:
I also prefer to enable Fancy Permalinks for URL formats optimized for search engines (SEO). From the WordPress Admin Dashboard, select Settings -> Permalinks, choose Day and Name and click Save Changes:

Note: you may save some time if you choose a theme and install the other plugins you plan to use before completing the rest of the W3 Total Cache configuration process. Changing themes and adding plugins will likely require you to purge your W3 Total Cache and re-export media files to your CDN.
General Settings
W3TC generally works well with its default settings. So, we’ll primarily need to configure the General Settings page and not go into each individual feature area.
Visit the W3TC General Settings page. From the left sidebar, click Performance -> General Settings e.g. http://yourdomain.com/wp-admin/admin.php?page=w3tc_general. We can perform high level set up here but then we’ll also do more detailed set up on individual settings pages. I leave unchecked/off “Toggle all caching types on or off (at once)” in the general box.
Enable Page Cache with Opcode: Alternative PHP Cache (APC):

Enable Minify with the following settings. I use manual mode because minify can break some themes if your settings are too aggressive (however, your chosen theme may work fine):

I leave unchecked/off Database Caching as this is recommended only if you do not activate Object Caching.
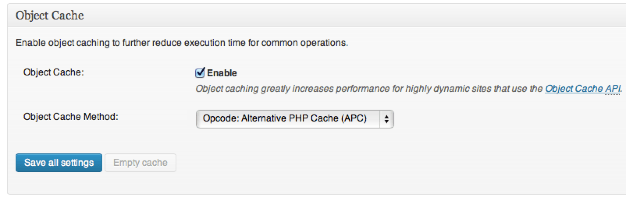
Enable the Object Cache:
Enable the Browser Cache:

We will activate the CDN but we describe it separately: Activating Amazon CloudFront.
Enable Reverse Proxy:
Configure W3TC to regularly purge the Varnish Cache from 127.0.0.1 (localhost).

Reverse Proxy – Purge Cache
Page Cache Settings
From the left sidebar, click Performance -> Page Cache. Scroll down to the Cache Preload box. Enable “Automatically prime the page cache”. Enter your sitemap URL. Note: You will need to have installed the Google XML Sitemaps plugin before this will function properly (see Install Themes and Plugins).

If you use a CAPTCHA on contact forms, you’ll want to include the path to these pages in the cache exclusion. Scroll down to the Advanced Setting box. Add your file path e.g. contacts here:

User Agent Groups
Because my theme is responsive, I cache mobile and tablet user agents separately. If you wish to do this, enable High and Low User Agent Groups:

Referrer Groups
I also enable Referrer Groups for search engines:

Minify Settings
Minify compresses your HTML, JS and CSS code and combines files when possible. This speeds up delivery of your pages and reduces bandwidth. However, it can sometimes break theme code.
You may have to adjust the settings for your chosen theme. I found that by turning off inline CSS minification, my theme works well. From the left sidebar, click Performance -> Minify:

Importing Example Settings (optional)
If you prefer to start by importing my settings file, follow these steps:
- Download the example settings file
- Visit the W3TC General Settings e.g. left sidebar, Performance -> General Settings and scroll to the bottom area with Import/Export Settings (see below).
- Beside Import configuration: click Choose File and select the example settings file you downloaded. Then, click upload.
- Browse your W3TC settings and ensure they make sense for your WordPress site
- You may need to customize settings for your site after the import e.g. Google PageSpeed, Amazon CloudFront CDN, etc.

CDN
It’s definitely worthwhile to activate a CDN. Follow the instructions on Activating the Amazon CloudFront to do so.
Monitoring
If you’re interested in performance monitoring with New Relic, follow the instructions described on Optimizing Your Instance Using New Relic.
If you’re interested in adding support for Google Page Speed, follow the instructions described on Optimizing Your Instance – Google Page Speed.
What’s Not Active
I’m not currently using CloudFlare, but would like to try it in the near future. If you’ve had experience with the service, please share your experience with us via comments. Since we’re using Amazon’s CloudFront for CDN, CloudFlare’s benefits are fewer than if we used it exclusively.
I’ve also not tried activating some of the custom performance optimization libraries supported by W3 Total Cache e.g. xcache and eAccelerator.
